Showing posts with label love sparkle pretty. Show all posts

The Debut of the 2014 New Line of Floral Crowns!!

As of yesterday, the new line of floral crowns have made their debut in the Etsy shop! I have been working on this line for a little while now and I am SO happy with each and every new piece.

I am incredibly thankful for each person that was a part of this shoot including the ever so talented Kayla of Kayla V Photography who took all of the beautiful photos of the pieces. I seriously squealed when I saw them!!

Also, a huge thank you to the models Ruby Elortegui, Mandee West and Chloe who drove up to Wrightwood to meet us from Los Angeles. You all are SO gorgeous and were such a pleasure to work with.
Donavan of Donavan Johnson Photography also accompanied us on this shoot as well as Anhel Torres who captured an amazing video of behind the scenes throughout the day (a snippet is shared below).

Here are the new designs added to Love Sparkle Pretty and a peek into the day spent in the mountains with pretty dresses, flower wreaths and camera equipment.

{enjoy}

The 'Laila' Floral Crown-Shades of Yellow, Pink and Ivory with a Large Rose Blossom that looks and feels freshly picked.
Far right: The 'Colette' Floral Crown-Shades of Peach, Blush and Ivory Petals.

The 'Leigh' Floral Crown-Shades of Blush Pink with a Large Rose Blossom that looks and feels so real!!

The 'Harlow' Floral Crown-Ethereal Inspired with Beige Ranunculus Petals, Garden Roses and Leaves Intertwined

The 'Amelia' Floral Crown- Shades of Pink, Maroon and White Blossoms

The 'Ellie' Floral Crown-Ivory Magnolia Petals with Lace and Crystal Center

The 'Annabelle' Floral Crown-Shades of Purple Blooms with Pearls and Fascinated Button Detail

The 'Poppy' Floral Crown- Shades of Fiery Yellow, Red and Orange with Pearls and Poppy Blooms 

  • Digg
  • Del.icio.us
  • StumbleUpon
  • Reddit
  • RSS

Sneak Peek of the Craft Studio

I have been working on organizing the new craft room since we've moved into our new home back in November. For the longest time, I had no motivation to create anything within the bare space and I know it was because the room was so uninspiring to me...yet I didn't want to organize or clean to fix the problem. Go figure right?

Well, as of a few days ago, I have been completely wrapped up in getting this room decorated, organized and 'encouraging'. I still have quite a bit of work to do but I'm pretty proud of it's progress.
Here's a little sneak peek of some details within my new craft studio.

Enjoy.

What's on the craft table...

I painted a closet door with chalkboard paint to fill with inspirational quotes and 2014 business goals.

The 'work desk'. Usually this space is full of papers, shipping labels, reminder post-its and new ideas.
As I organize this room, I feel the need to create. This gives me the most inspiration when I need it. Although I had surgery two days ago, I have been in this room at my craft table several times because I gravitate towards a clean slate that begs to become a creative mess. It's this longing in my DNA. It's just a part of me!
Where do you reside for your creative outlet?

  • Digg
  • Del.icio.us
  • StumbleUpon
  • Reddit
  • RSS

DIY 'CREATE' Glitter Banner


This year, I wanted to have a craft studio that inspired me. With a larger space, the creative possibilities are almost endless! 
The word, "create" seems to bring inspiration and I wanted to display it not only for myself but I wanted to share it with a couple of friends as well. So, as a part of a few Christmas gifts, I made some of these "create" banners to serve as reminders throughout this new year.

Here's what you'll need:
*6 pieces of cut (~4"x3") fabric. I used muslin.
*Hot glue
*Glitter
*A scratch piece of paper
*A pencil
*Lace &/or trim (or any other type of ribbon or twine you'd like to hang the letters from)

First, you will lay your cut pieces of fabric out and if you need to, trace your letters onto your fabric (one letter to each piece). Next, take your Elmer's glue or any other white school glue and trace one of your letters you wrote. *If you are confident in your handwriting, you probably don't have draw the letters first with pencil.

Next, pour your glitter carefully over the letter you just drew. Once it is covered, gently pat the excess glitter onto your scratch piece of paper. Set aside to dry.

After your first letter, write your next letter with the glue. You can use the excess glitter from your scratch paper to cover the rest of your letters by creating a small crease in the paper to let the glitter slide down easily. Use the glitter from your jar/tube when needed.
Also, you can use the tip of your pencil to smooth any edges that may be uneven from the glue.

Once all of your lettering is finished, set aside to dry for about 10 minutes or so.

If you are using lace fabric (like I have), you can cut a strip about 1" by 26"-30". Your letters will hang from this strip of lace. If you are using ribbon or trim, just cut it so the length measures about 26"-30".

When your letters are dry, you can now attach your letters to your trim/ribbon. Leave about 3"-4" on the end of your trim and start to glue the top of your letters to the trim about a .5" apart. You can use the white glue if you prefer but I find that hot glue works best for this because it dries much quicker.

If you are using lace fabric, you may see the glue show through so for my solution, I used another lace trim to attach to the top of each letter and folded over.

& your banner is done and ready to hang!
What's your word of 2014?
Have a beautiful New Year! 

  • Digg
  • Del.icio.us
  • StumbleUpon
  • Reddit
  • RSS

Last Minute DIY Christmas Ornaments

The other night while going through the organizing stages of my craft room, I got a bit side-tracked (not the first time) & instead of cleaning up, I ended up creating new Christmas ornaments! I found 2 clear ornaments and decided that I needed to use them within our tree decor since I have yet to finished holiday decorating.

Here's what I did:

I used gold beaded ribbon. For the large ornament, I used about 40" and the small about 25".
Cut strips of old book pages (you can also use old music sheets).
Cut 2 small strips of burlap and lace for each ornament (about 5" each).

I placed the gold bead strand inside of the ornaments first.
Then, one by one, I placed the strips of book pages inside and tried to place them around the ornaments in different angles.
Once I filled them up, I put the top on and tied a burlap and lace fabric strip to each.

VOILA! Super easy, unique and they go perfectly with our neutral/rustic living room decor.

Have a beautiful Christmas my friends!

  • Digg
  • Del.icio.us
  • StumbleUpon
  • Reddit
  • RSS

Dream catchers INSTASALE today at 2pm! Lace, Beading and Feathers-OH MY!

I'm hosting a little Instasale today at 2pm PST on my handmade dream catchers! After creating a few for others, I have been asked several times about making more. As of right now, these pretty pieces aren't available in the shop so get yours today through my Instagram sale. There will only be a VERY limited amount of dream catchers that will be posted so please don't hesitate.
I may be taking a few custom orders as well if you have them. Please send me an email: lovesparklepretty@aol.com if you wish to place a custom order. Thank you so much!

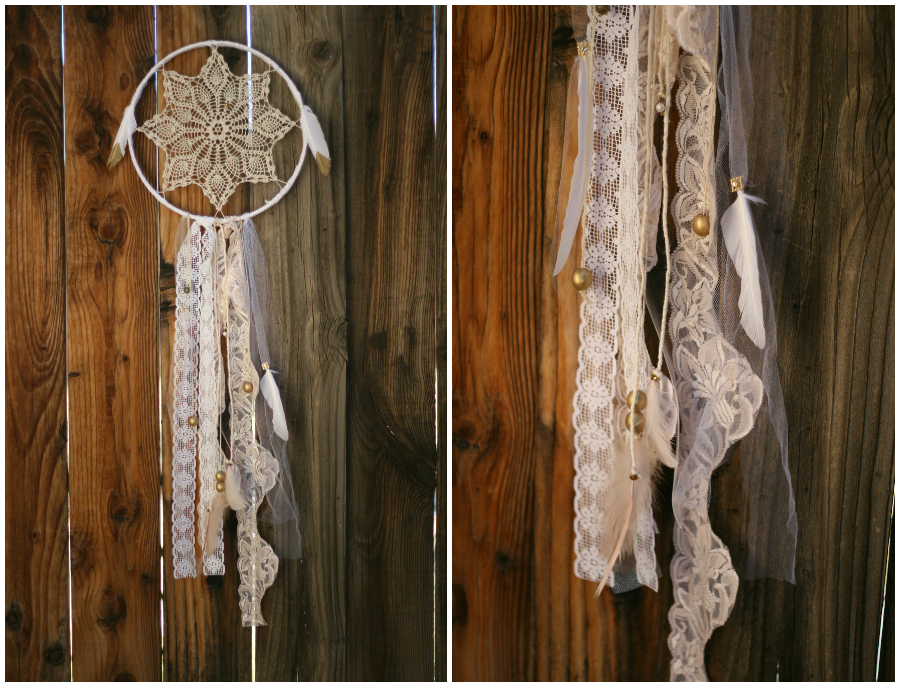
Here are the dream catchers that will be available on the Instasale and ready to ship.


 You can purchase these on my Instagram at 2pm PST by leaving your Paypal email address in the comments below each photo. Once invoices are sent, they must be paid within 24 hours or the next person in line will be able to purchase.

Thank you so much! :)

Happy Friday!

  • Digg
  • Del.icio.us
  • StumbleUpon
  • Reddit
  • RSS

The shop is REOPEN!! New items and Black Friday Sales!

After about 2 and a half weeks of "shop vacation" due to our move, Love Sparkle Pretty is now officially REOPEN!

There are Black Friday Sales going on and there are so many new items making their debut along with others that will be added in a couple of days!
Here are just a few new items:

Photo Credit: Kayla V Photography

Photo Credit: Kayla V Photography

This is just a peek. Check out the shop right here!

I hope everyone had a BEAUTIFUL Thanksgiving! I know we certainly did. Although it was kind of crazy to host Thanksgiving dinner after moving into our new home a week and a half ago, it was totally worth it. :)

Have a wonderful weekend!

  • Digg
  • Del.icio.us
  • StumbleUpon
  • Reddit
  • RSS